


Let me tell a bit story
As a PHP developer, one thing that we must do is creating development environment. I've tried XAMPP and Laragon on my Windows desktop, while use LAMP stack with my Linux. The problem arise when I have two projects that need to run and communicate each other. If I have two different specifications, I felt that my work is not efficient.
With my office laptop always has problems with its Windows, I decide to migrate that laptop to Ubuntu. The option was two, use LAMP stack and manually switch AMP version when move project, or use Docker. The second is the choice, of course. So, I think enough for story, here we go!
Let's Start
Use Case
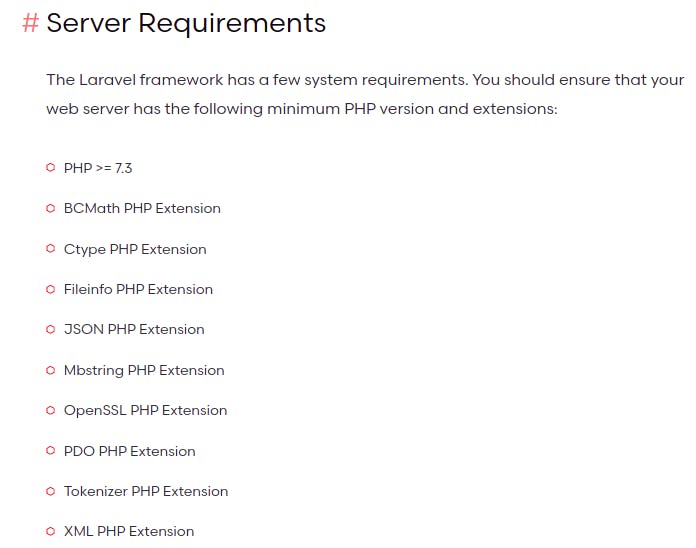
We will create a Laravel 8 project, so here is the server requirements captured from the docs:
 We will create 6 containers:
- nginx
- php
- mysql
- artisan utility
- composer utility
- npm utility
Build the Image
We only need to build PHP image and inject it with some package. To create an image, we could use commit or use Dockerfile.
Dockerfile contains the commands that will be executed when running build command. Create Dockerfile and copy this code
FROM php:7.4-fpm-alpine

RUN docker-php-ext-install pdo pdo_mysql

COPY --from=mlocati/php-extension-installer /usr/bin/install-php-extensions /usr/local/bin/
RUN install-php-extensions gd

COPY --from=composer:2 /usr/bin/composer /usr/bin/composer

WORKDIR /var/www/html

RUN addgroup -g 1000 user && adduser -G user -g user -s /bin/sh -D user

USER user
Code explanation:
FROM php:7.4-fpm-alpine: The build process will use the image as base. In this case, we will use alpine images.docker-php-ext-installused for installing some PHP extenstion, but not all extension can be installed with this command.install-php-extensionsis alternatif fordocker-php-ext-installnot find the extension.COPYwill copy file from our host or other images to the image we build. On the code above, we can see thatcomposerandmlocati/php-extension-installerare copied, and both will be able to execute.WORKDIRtells the dockerfile to change the working directory.- Last two lines are to create non root user to level up the security.
Save Dockerfile and run this command to build the image:
#docker build <path> -t <name:tag>
docker build . -t ggsuha/php:7.4-fpm-alpine
Wait until the process finish and check your image with docker images command.
Create Compose File
With compose file, we will run multiple container on the same time. I will show the directory tree of my project for this compose file.
+-- nginx
|   +-- nginx.template
+-- src
+-- docker-compose.yaml
First, add PHP container. This container use image we created on previous step. With volume, directory src will bound with directory var/www/html of container. We use version 3.8 for this one.
version: '3.8'

services:
    php:
        image: 'ggsuha/php:7.4-fpm-alpine'
        volumes:
          - ./src:/var/www/html
Next, create MySQL container. Add this line below inside services. This container will use port 3306 and set username & password as in environment. With volume, the database won't lost when the container is stopped.
mysql:
    image: mysql:5.7.36
    ports:
      - '3306:3306'
    command: --default-authentication-plugin=mysql_native_password
    environment:
      - MYSQL_ROOT_PASSWORD=123456
      - MYSQL_USER=laravel
      - MYSQL_PASSWORD=changeme
      - MYSQL_DATABASE=laravel
    volumes:
      - data:/var/lib/mysql
Next, create Nginx container. This container will use port 80 and bind volume from src to /var/www/html. If you see bind volume nginx.template, this file will used to overwrite default nginx configuration with the command listed on there. depends_on indicate that container php and mysql will started before this container.
nginx:
    image: 'nginx:stable-alpine'
    ports:
      - '80:80'
    restart: on-failure
    volumes:
      - ./src:/var/www/html
      - ./nginx/nginx.template:/etc/nginx/conf.d/default.template
    environment:
      SITE_URL: laravel.test
      ROOT_DIR: /var/www/html/public
    working_dir: /var/www/html
    command: /bin/sh -c "envsubst '$${SITE_URL} $${ROOT_DIR}' < /etc/nginx/conf.d/default.template > /etc/nginx/conf.d/default.conf && nginx -g 'daemon off;'"
    depends_on:
      - php
      - mysql
This is nginx.template:
server {
    listen 80;
    index index.php index.html;
    server_name ${SITE_URL};
    root ${ROOT_DIR};

    location / {
         try_files $uri /index.php?$query_string;
    }

     location ~ \.php$ {
         try_files $uri =404;
         fastcgi_split_path_info ^(.+\.php)(/.+)$;
         fastcgi_pass php:9000;
         fastcgi_index index.php;
         include fastcgi_params;
         fastcgi_param SCRIPT_FILENAME $document_root$fastcgi_script_name;
         fastcgi_param PATH_INFO $fastcgi_path_info;
     }
}
Three main containers already listed, then we create utility containers.
composer:
    image: 'ggsuha/php:7.4-fpm-alpine'
    entrypoint: ["composer"]
    volumes:
      - ./src:/var/www/html

  artisan:
    image: 'ggsuha/php:7.4-fpm-alpine'
    volumes:
      - ./src:/var/www/html
    entrypoint: ["php", '/var/www/html/artisan']
These two containers will use same image as PHP container since basically both composer and artisan are using PHP to execute.
Sometimes we need npm when working with Laravel, so add one container to handle npm command.
npm:
    image: node:12.22.9-alpine
    working_dir: /var/www/html
    entrypoint: ['npm']
    volumes:
      - ./src:/var/www/html
Lastly, define volume for MySQL data on parallel indent with services.
volumes:
  data:
Spin up Server
Since there is bind volume on src directory, we need to create the directory first.
mkdir src
Or you can manually create it using file manager. Because we set PHP and MySQL container as dependencies, we only need to spin up the Nginx server. Run this comment:
docker compose up -d nginx
With d flag, containers will run in the background. The result should be like image below. Three main containers started and it created network and volume (if volume doesn't exist).

Check server
Visit localhost with your browser.
 The result is 404 because we don't have index file on working directory. We can try to add an index file on
 src directory, but I will straight with Laravel project. So we will use utility container to initiate the project.
Use of Utility Containers
What is actually these containers? There are some commands that we need and often we use, so we wouldn't need to access the main container. It is just preference of each person, though. If you don't want to create or use utility container, you need to access the PHP container and run the command inside container.
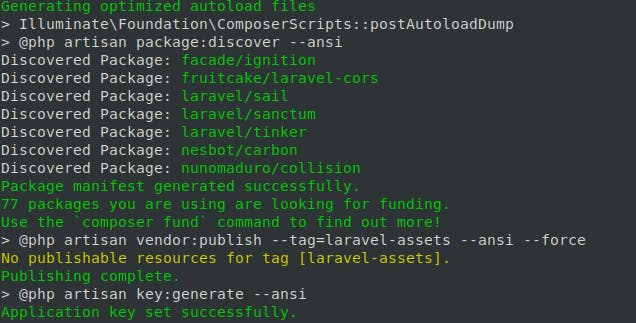
We have three utility containers, since each of container have their entrypoint, we will use this to execute several commands (artisan, composer, and npm). So let's start with creating project with composer utility. This container can run even when main container are still down. So, you can create project with composer before spin up the server.
#composer
docker compose run --rm composer create-project laravel/laravel .

#try this artisan command to check if the utility container works
docker compose run --rm artisan --version

#try this npm command to check if the utility container works
docker compose run --rm npm --version
 After that, refresh your page on the browser, this is my result:
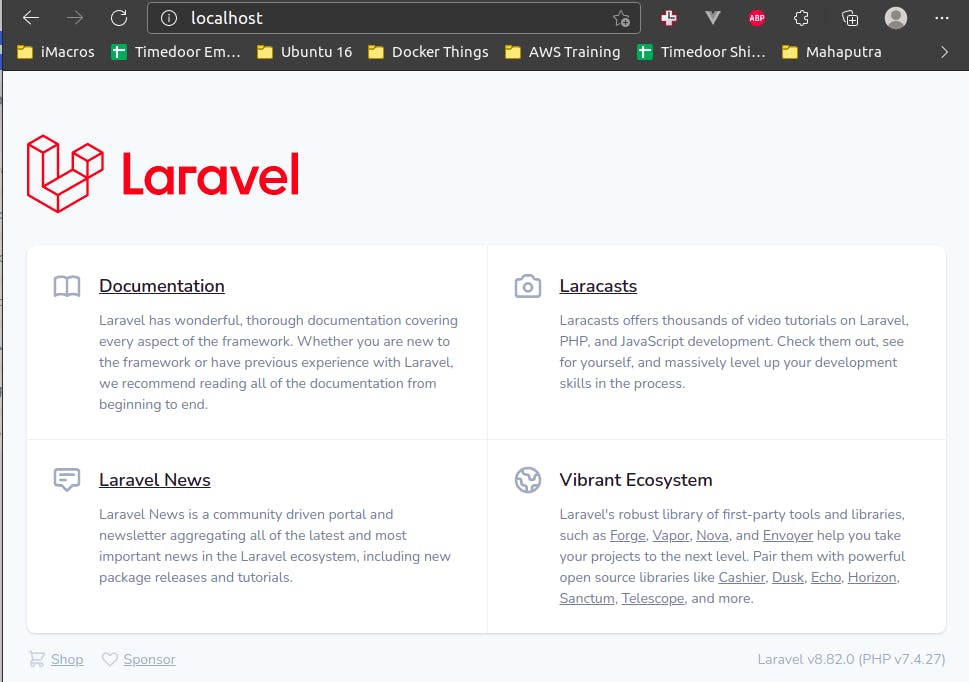 You can add your custom url to hosts file, so you could access it with pretty url.
Accessing MySQL Database
There is to source when accessing the database
- From host
DB_CONNECTION=mysql DB_HOST=127.0.0.1 DB_PORT=3306 DB_DATABASE=laravel DB_USERNAME=laravel DB_PASSWORD=changeme - From other containers, host is MySQL container's name
DB_CONNECTION=mysql
DB_HOST=mysql
DB_PORT=3306
DB_DATABASE=laravel
DB_USERNAME=laravel
DB_PASSWORD=changeme
Conclusion
There are so many ways to develop a website with Docker, either with single image or using docker compose. I hope you all get something new from this article. There is still a long way to go, I also still need a lot to learn and improve how web development is more efficient with Docker.
Check out the code: